ShikataLab v2 - A Re-done Homelab to save me time debugging
There are a few small things I host in my homelab, most of these are some easy to utilize tools that make my life and others in my friend group easier overall, these include, but are not limited to:
- A Readarr and Calibre-Web service that allows me to manage a eBook library using .epubs I have online
- A AdGuard DNS endpoint with scraping and logging disabled, to reduce tracking from upstream AdGuard DNS servers (this is a bit flawed, as AdGuard DNS has a fairly okay privacy policy overall, but its still a nice-to-have to be able to customize some special DNS blocking for social media trackers or specific bad habits I want to avoid (i.e. TikTok, YouTube Shorts, etc)
- Some seedboxes for things I want to host
The Challenge
Up until about 2024, I had this all hosted within Proxmox, a easy to use enterprise hypervisor management platform similar to VMWare, it had a few drawbacks, though, most notably:
- Since I was reliant on a single grid, power outages that would knock my home off the grid would fail; I originally had a fairly robust UPS system (copying Jeff Geerlings design here) using a network UPS tool caled NUT - but it wasn’t as easy to maintain as i’d like
- Overall power draw with this was fairly large using the original setup I had with spare servers that I’ve obtained at previous employment - I originally reduce this down by shrinking my homelab to fit into a Raspberry Pi 3 Cluster, along with a NUC - then only using the NUC for non-critical services and powering it down when not in use. However, this quickly turned into more of a deterrent for playing around with the homelab, as i’d never actually power up the NUC except for some special usecases (e.g. cold storage backup, etc.)
- A good chunk of services i’d host started generating a small amount of revenue (mostly from people whom wanted to host a Minecraft server or use my Readarr service outside of my friend group) - I had a bit more pressure to keep the NUC stuff always available and never have it go down
As such, i started wondering if it was a good idea to move stuff over to an OCI instance; it is very commonly discussed as a defacto good place to host in their free tier, their underlying offering is super interesting, as it allows for fairly powerful Ampere instances to be used for hobbyists (obviously, understanding that it may be revoked at any time) - I eventually decided to move stuff slowly over to there over the course of a holiday weekend. This explains a bit of what that migration looked like, and decisions and challenges along the way
Moving to OCI
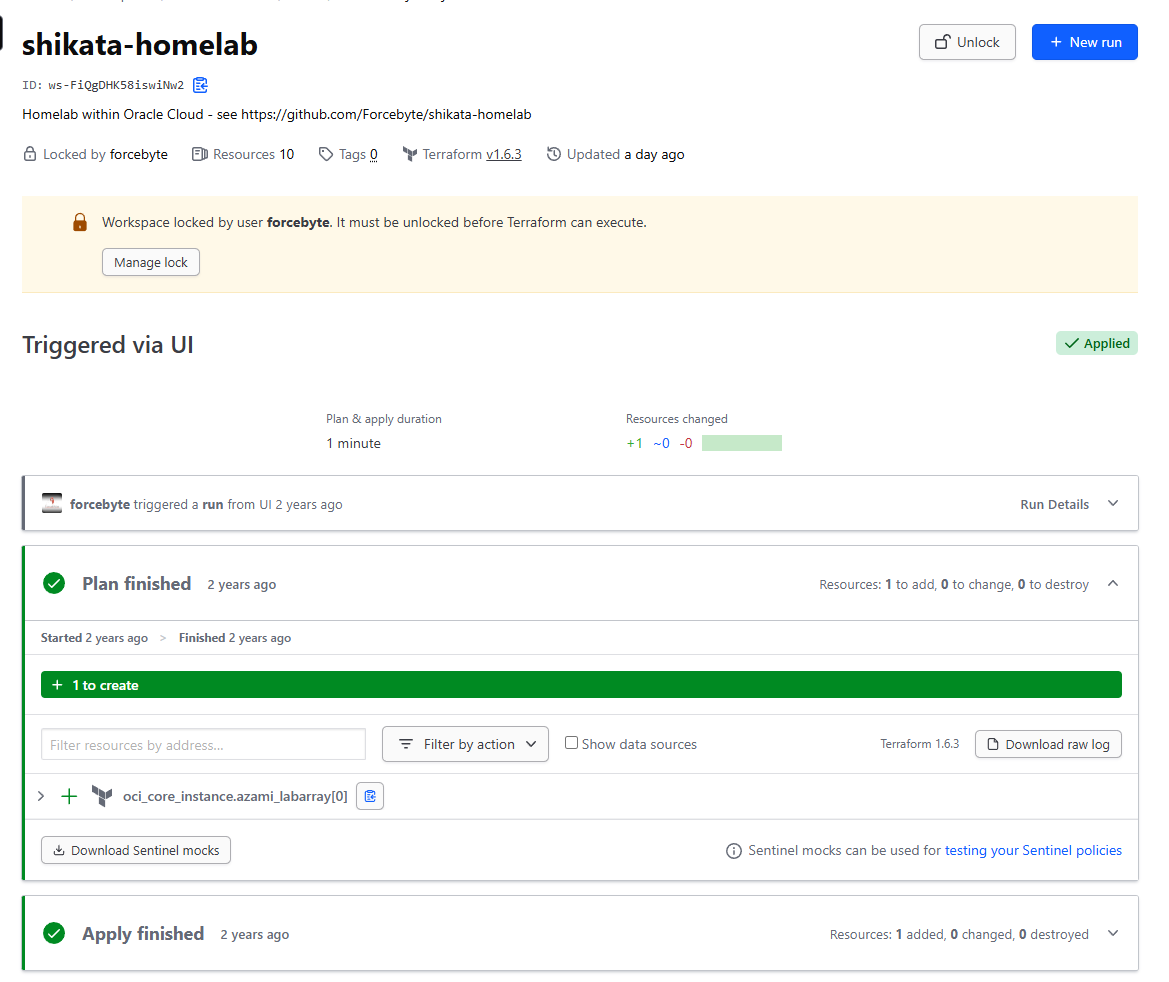
Thankfully, I had added a free-tier Ampere instance configured already, using a simple TF workspace set up around 2 years ago to set things up, and it already had an Ampere instance and Intel instance configured:
This originally had all my services mirrored to Portainer using Docker Swarm, but I found it annoying to have to manage things like Traefik network overlays and proxies; so I decided to try and roll it into Kubernetes like in every other configuration I had available; I figured it may be annoying to set up - but it beats the troubleshooting I’ve had to do in the past
Setup and enablement
Networking
First things first, setting up the network within the OCI instances, I want to ensure that there is still some sort of enabled networking capabilities between instances, this is very simple, outbound setup, a single VCN (Virtual Cloud Network) with a routing table to an internet Gateway, such that interconnectivity between nodes isnt impeded, and internet access can be restricted via a security group within the network like so:

This will also assert that the primary VNIC of the instances is the private facing ones. Along with the route table, it will allow all outbound traffic to prefer routing to different nodes, when available, and otherwise egress through the internet:
Node Set-up
Once completed, I can easily set up K3s (a lightweight distribution of K8s) to try and get things going. I did this the lazy way, and will likely change this to use an externalized datastore (since OCI does support databases, but just not the versions that k3s does)
I could do this via Ansible, but alas, I am a lazy man:
curl -sfL https://get.k3s.io | sh -

# After complete, use this master token for other nodes
cat /var/lib/rancher/k3s/server/token
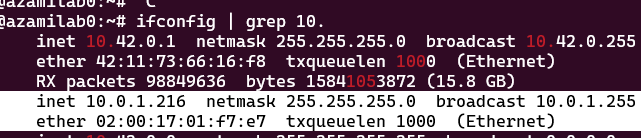
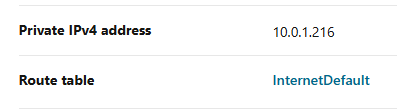
This will give us a master node to execute workloads on, using the same script, installing on separate nodes can be done like so, (note, the node IP should be the private IP as seen in the OCI Console or via ifconfig, do not use the public IP)
curl -sfL https://get.k3s.io | K3S_URL=https://10.0.1.216:6443 K3S_TOKEN=$(cat /var/lib/rancher/k3s/server/token) sh -
This will give you two nodes that we can set up further configs on:

Secret Stores
Before I continue; this is not exactly the best way to go about this - ideally you should use a Secrets Provider, the free tier of OCI’s secrets management solution is a good method alongside the external secrets operator is probably the best way to do this - but alas, I am a lazy man.
In our situation, we are going to configure a Service Account for Terraform to use to add a flux bootstrap, this will allow us to securely set K8s secrets without manually adding them, and allow them to be updated from a single point of reference (that is, Terraform itself) - this is not ideal, but it works
To start, we’ll use a free-tier HCP Terraform account to create and enable remote terraform VCS integration - in this, we created a workspace secret per token we want to add to k3s like so:
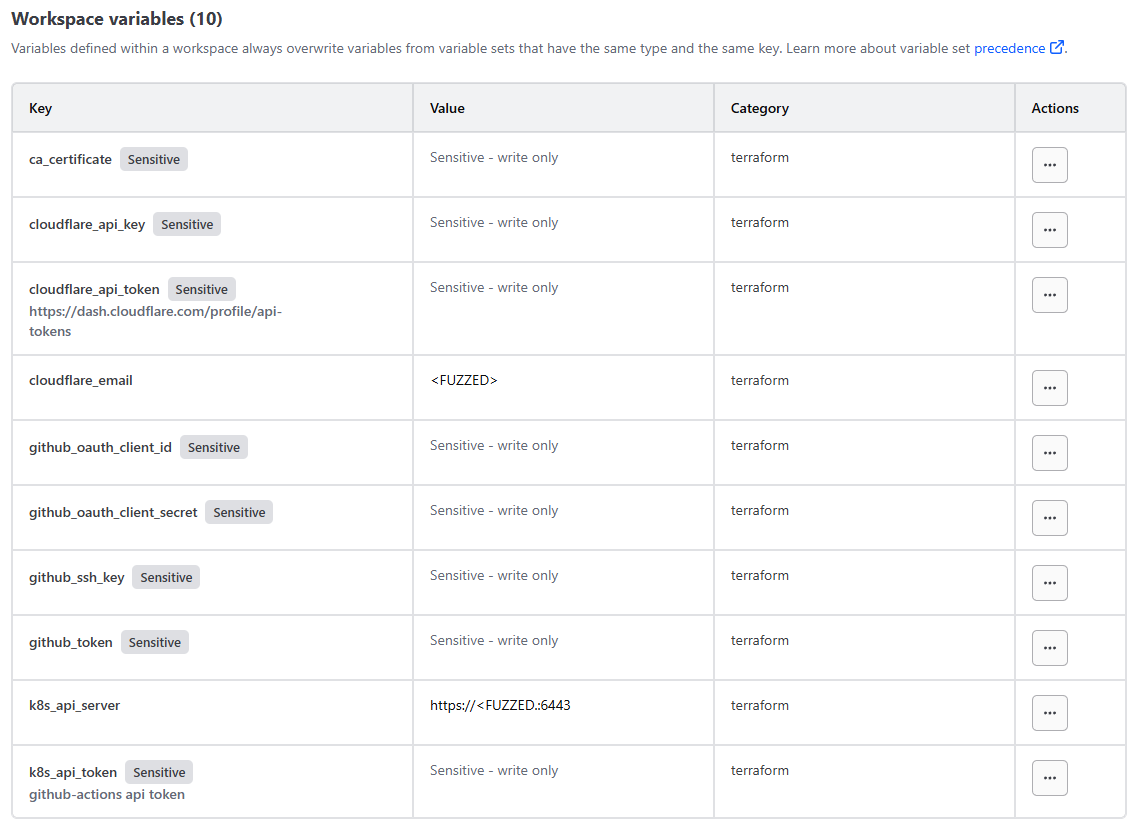
Then, with the VCS integration we added; I can configure a provider.tf file with my local K8s API secret and secret to store secrets:
provider "kubernetes" {
  host                   = var.k8s_api_server
  token                  = var.k8s_api_token
  insecure               = true # certificate is valid for 10.0.1.216, 10.43.0.1, 127.0.0.1, ::1, not xyz
}
I can then create a ‘godmode’ token for terraform to apply various resources:
apiVersion: v1
kind: ServiceAccount
metadata:
  name: tfc
  namespace: default
secrets:
  - name: tfc-token
---
apiVersion: v1
kind: Secret
metadata:
  name: tfc-token
  namespace: default
  annotations:
    kubernetes.io/service-account.name: tfc
type: kubernetes.io/service-account-token
---
apiVersion: rbac.authorization.k8s.io/v1
kind: ClusterRole
metadata:
  # Name the role "godmode" for clarity
  name: godmode
rules:
  - apiGroups: [""]
    resources: ["*"]
    verbs: ["*"]
  - apiGroups: ["apps"]
    resources: ["*"]
    verbs: ["*"]
  - apiGroups: ["batch"]
    resources: ["*"]
    verbs: ["*"]
  - apiGroups: ["extensions"]
    resources: ["*"]
    verbs: ["*"]
  - apiGroups: ["networking.k8s.io"]
    resources: ["*"]
    verbs: ["*"]
  - apiGroups: ["storage.k8s.io"]
    resources: ["*"]
    verbs: ["*"]
  - apiGroups: ["rbac.authorization.k8s.io"]
    resources: ["*"]
    verbs: ["*"]
  - apiGroups: ["apiextensions.k8s.io"]
    resources: ["*"]
    verbs: ["*"]
  - apiGroups: ["*"]
    resources: ["*"]
    verbs: ["*"]
---
apiVersion: rbac.authorization.k8s.io/v1
kind: ClusterRoleBinding
metadata:
  name: tfe-godmode-binding
subjects:
  - kind: ServiceAccount
    name: tfc
    namespace: default  # Change this to the namespace where your service account resides
roleRef:
  kind: ClusterRole
  name: godmode
  apiGroup: rbac.authorization.k8s.io
Once applied (via kubectl) we can then grab the secret for use in TFC:
k get secret -o yaml tfc-token -n default
Add this to TFC’s secrets, and then I can then configure secrets via a simple terraform ‘resource’ like so:
resource "kubernetes_secret" "traefik_github_oauth-kubesystem" {
  metadata {
    name      = "github-oauth-secret"
    namespace = "kube-system"
  }

  data = {
    "clientId" = var.github_oauth_client_id
    "clientSecret" = var.github_oauth_client_secret
  }

  type = "Opaque"
}
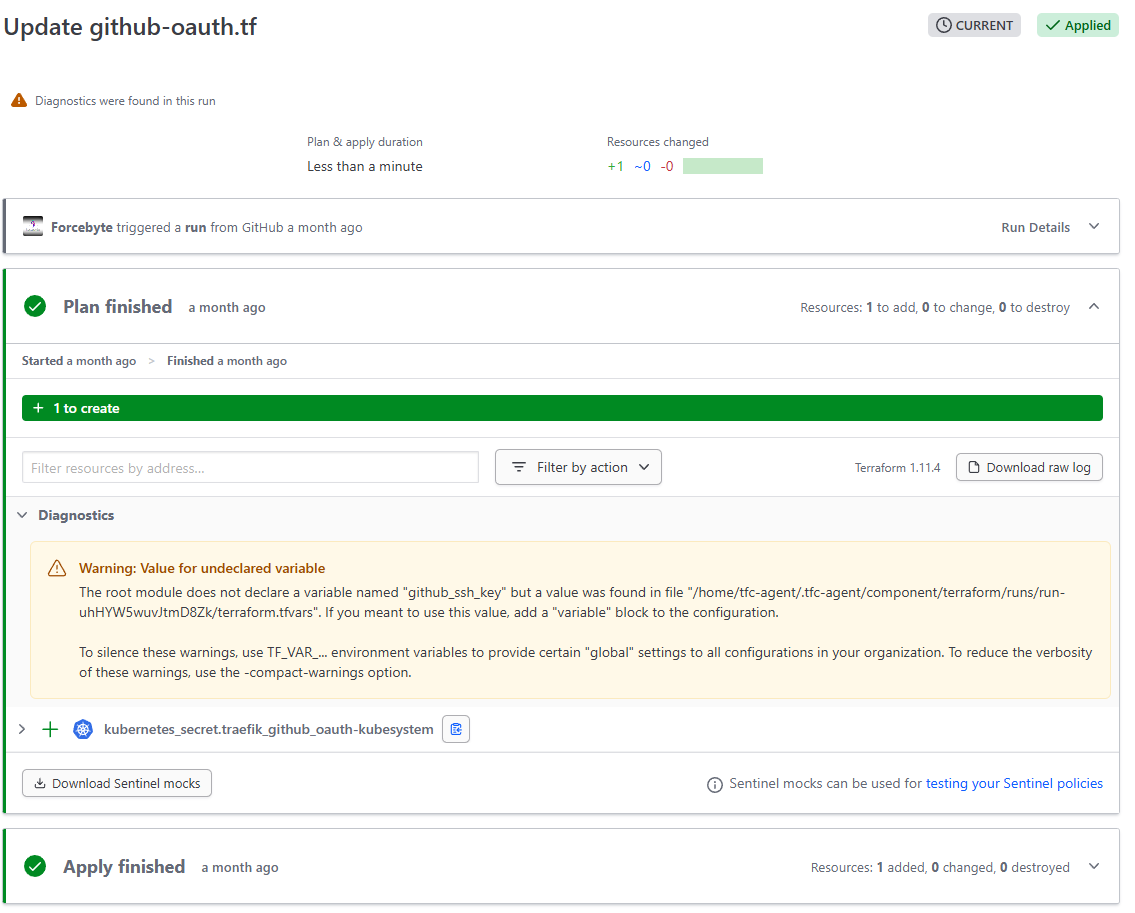
Now that its completed, we can then start working on bootstrapping - whenever we want to place secrets in the cluster in the future (for example, an API key or oAuth key) - we can use Terraform to place and manage the secret accordingly to prevent drift
Flux Bootstrap and Configuration
Again, fairly simple to configure and utilize, Flux actually has a bootstrap configuration that is supported via Terraform enterprise, which is convinient to use in this specific usecase, as it lets us simplify the setup and update process quite a bit
first, configure the provider to point to the token
provider "flux" {
    kubernetes = {
        host                   = var.k8s_api_server
        token                  = var.k8s_api_token
    }
    git = {
        url = "https://github.com/forcebyte/shikata-homelab-v2.git"
        http = {
            username = "git" # This can be any string when using a personal access token
            password = var.github_token
        }
    }
}
And add the bootstrap like so:
resource "flux_bootstrap_git" "this" {
  embedded_manifests = true
  path               = "k8s/apps"
  interval           = "30s"
}
Once configured, Flux will automatically deploy the underlying controller to sync deployments
App Deployments
Now that we have everything configured, we can simply configure a deployment, the easiest first thing would be a github oauth proxy - as I want to ensure that connecting to applications is done using a identity provider (primarily to remove brute-force attempts on the stuff I deploy publically)
To do this, configure a deployment within the GitHub repository like so:
.
├── LICENSE
├── README.md
├── k8s
│   ├── apps
│   │   ├── github-oauth
│   │   │   ├── deploy.yaml
│   │   │   └── kustomization.yaml
│   ├── init.yaml
│   └── kustomization.yaml
└── terraform
    ├── flux.tf
    ├── github-oauth.tf
    ├── providers.tf
    └── variables.tf
Within the k8s/apps folder, create the standard Kustomization and deployment YAML files, like so
kustomization.yaml
apiVersion: kustomize.config.k8s.io/v1beta1
kind: Kustomization
resources:
  - deploy.yaml
deploy.yaml
apiVersion: apps/v1
kind: Deployment
metadata:
  name: github-oauth-server
  namespace: kube-system
spec:
  replicas: 1
  selector:
    matchLabels:
      app: github-oauth-server
  template:
    metadata:
      labels:
        app: github-oauth-server
    spec:
      containers:
        - name: github-oauth-server
          image: muxiu1997/traefik-github-oauth-server:latest
          env:
            - name: GITHUB_OAUTH_CLIENT_ID
              valueFrom:
                secretKeyRef:
                  name: github-oauth-secret
                  key: clientId
            - name: GITHUB_OAUTH_CLIENT_SECRET
              valueFrom:
                secretKeyRef:
                  name: github-oauth-secret
                  key: clientSecret
            - name: API_BASE_URL
              value: "https://github-oauth.forcebyte.org/"
            - name: DEBUG_MODE
              value: "true"
          ports:
            - containerPort: 80
---
apiVersion: v1
kind: Service
metadata:
  name: github-oauth-server
  namespace: kube-system
spec:
  selector:
    app: github-oauth-server
  ports:
    - protocol: TCP
      port: 80
      targetPort: 80
  type: ClusterIP
---
apiVersion: traefik.io/v1alpha1
kind: IngressRoute
metadata:
  name: github-oauth-server
  namespace: kube-system
  annotations:
    external-dns.alpha.kubernetes.io/target: github-oauth.forcebyte.org
    kubernetes.io/ingress.class: traefik
spec:
  entryPoints:
    - web
  routes:
    - match: Host(`github-oauth.forcebyte.org`)  # Replace with your domain
      kind: Rule
      services:
        - name: github-oauth-server
          port: 80
---
# Middleware for GitHub OAuth
apiVersion: traefik.io/v1alpha1
kind: Middleware
metadata:
  name: github-oauth
  namespace: kube-system
spec:
  plugin:
    github-oauth:
      logLevel: debug
      apiBaseUrl: "https://github-oauth.forcebyte.org"
      whitelist:
        logins:
          - "Forcebyte"  # Replace with your GitHub username